Sunday, May 31, 2009

Oatmeal Mango Cookies

I love oatmeal raisin cookies as much as I love chocolate chip and snickerdoodles. One thing I've never seen are oatmeal cookies with mangoes. I don't know if there's a recipe already out there, if there is I guess you can add this to the list. It popped in my heard the other day. I know there's been oatmeal with cranberry, so why not mango? I thought of using some fresh mango, but I was afraid that it'll turn it into mush. The alternative was the dried kind.

One of my favorite snacks growing was dried mangoes. One of the advantages of where I live is that there are several Filipino markets selling goods from the homeland. So I never feel homesick for snacks, treats and ingredients that I grew up loving. Dried Mangoes are best for using in cookies. The ones I used is the Philippine brand. Made from the Island of Cebu in the Visayan region. It's one of their many specialties along side the best whole roasted pig you'll ever eat. Even Anthony Bourdain said it was the best pig he's eaten.

The Philippine brand dried Mangoes are lightly sweetened. It's a healthy afternoon snack and oh-so-good! Great for fiber, too. Thought I'd throw that in there. You don't necessarily have to use this brand. I know Whole Foods, Costco and, I think, Trader Joe's carry dried mangoes. So they're definitely out there. Just be sure to get the lightly sweetened kind because when you bake it, they will caramelize inside the cookie.

I cut the dried mango to the size of raisins for chewability. I also love it when it's loaded with oats. The mangoes are not overwelming, so it blends nicely with the cinnamon flavor.

These will make 12 cookies.


Oatmeal Mango Cookies

1 c dried mangoes (cut into 1/4 inch pieces)
1 c rolled oats
1/2 c unsalted butter or margarine
1/2 c brown sugar
2 eggs
1 1/2 c cake flour
1 Tbsp ground cinnamon
1 tsp Vanilla extract
1 tsp baking soda
1/2 tsp salt

Preheat oven to 350˚F

Sift together flour, baking soda, salt and cinnamon.

In a separate bowl, cream together butter and sugar. Add in each egg, stirring after each one. The add vanilla.

Mix in oats and mango pieces. Divide the mixture into 12 equal pieces and place on a lightly greased baking sheet, parchment paper or silpat.

Bake for 8 to 10 min.

Saturday, May 30, 2009

Tuna Corn Cakes with Garlic Yogurt Sauce


This is my entry to BSI (Blogger’s Secret Ingredient). Hosted this week by Sophia from Burp and Slurp. The secret ingredient chosen was corn. It just so happens that I had a can of sweet corn from Trader Joe's in the cupboard, so it seem a perfect time to use it. Plus since summer is upon us and corn is in demand, I needed to do something with it as well. I figured why not add tuna into the mix. It gave me a chance to use up two more cans of tuna from the bulk I bought from Costco. Sweet!

I quickly did a pan-fry to seal the top and bottoms crusts, then baked it for a few minutes to brown the edges and cook the inside. I served this with a garlic yogurt sauce and a freshly diced tomato lightly tossed with some salt and olive oil.


Tuna Corn Cakes

2 5oz can tuna in water
2 can sweet corn
1 c Panko Crumbs
1 shallot diced
2 egg (beaten)

Preheat your oven to 400˚F

Drain all the water from the tuna as well as all the liquid from the corn. Make sure they are both dry. Pat them with a paper towel, if needed. Mix the two together in a medium bowl. Add in the diced shallot and mix in the 2 beaten eggs.

Divide into 6 cakes.

On med-high heat, coat the bottom of a pan with olive oil. When the oil is hot enough, sear the tops and bottoms of the patties until they form a nice crust. (roughly 2-3 min)

Transfer the patties onto an ungreased baking sheet and bake for another 5-8 min to crisp the edges.

Remove from oven and serve.


Garlic Yogurt Sauce
1 5oz cup plain yogurt
2 garlic cloves minced
1 Tbsp lemon juice
salt

Combine yogurt, garlic and lemon juice. Season with salt to taste.

Drizzle over the tuna corn cakes and garnish with some seasoned diced tomatoes.


Friday, May 29, 2009

Pinoy Style BBQ


Each culture has their own way of doing the B-B-Q. Here's a Filipino way of doing it. Filipino barbecue are on skewers and generally use pork butt (fat and all). Kabob style. (I used chicken tenders. Another great way to use up that big bag from Costco.) It makes an easy eat and travel food. We also do ribs and what not, but if you want to make authentic Filipino barbecue it's got to be the skewer version with a slight sweet marinade/sauce.

If you've ever been to a Filipino gathering or party, there will always be the essential food found on the buffet table like lechon (suckling whole roast pig) or lechon kawali (deep-fried pork), pancit (noodle dish), lumpiang shanghai (egg rolls), steamed rice, sinigang and barbecue or adobo. There's also a couple optional items palabok, fried chicken, kare kare, leche flan and a few others. I'll be making some of those in the coming months except the whole roast pig. Don't have room for that. Two things Filipinos are known for are their hospitality and making sure everyone is well-fed, even when the budget is out of their means. You never leave empty handed either. Whether you like it or not, you'll be taking food home.

Here's a hint in pronouncing words in the Philippine language. In tagalog (ta-ga-log), all words are spoken in short vowels. Long vowels are nonexistent and it's a "say it like you see it" language. Take for instance, the word pinoy, it is pronounced pin-oy. Simple. Or kamusta = ka-moo-sta, meaning hello or how are you. Or salamat = sa-la-mat, meaning thank you. There's also spanish words and phrase used in the language as well as the Philippines was colonized by the Spaniards. Then you'll get people speaking taglish. Intermixing of tagalog and english. That's a whole other thing altogether. You'll never know when you'll be invited to a Filipino gathering, so it's good to know these things. Alright, enough of the language lesson. Where was I going with this? Oh, that's right...Pinoy Style BBQ.

Now I don't have an outdoor grill, I'd even be happy with a little hibachi, if I could. Blame it on the landlord. Grr! But then I realized that I had one of those George Foreman grills. Woohoo... Here I was complaining and feeling envious of those being able to grill steaks, fish and veggies when in fact I had a grill all along. LOL. Duh, Jenn! (*slaps forehead*) I only used the thing a few times when it was the "it" thing to have. Since then it's been sitting my my "clutter" closet. So I dusted it off, cleaned and disinfected it from any weird stuff that may have attached itself and prepared my barbecue.

I also grilled some skewered bell peppers and onions. I didn't have pineapple chunks, but they also go great with the bell peps. The Filipino version calls for calamansi juice and banana ketchup. I had seen the ketchup in some of the Asian aisles of supermarkets as well as Asian/Filipino markets. For those unable to find those two ingredients, you can use lemon or lime juice and regular tomato ketchup.


I had briefly written about the calamansi when I first started this blog back in march (Calamansi - Fruit of the Day). Info about this little fruit can be found here via Wikipedia: Calamansi info The banana ketchup is purely made from bananas. No tomato is found in it. It is banana mashed with sugar, vinegar and spices. The red comes a little red food coloring in the mixture. Here's a recipe from recipezaar, if you'd like to try making you own at home (here). I haven't tried it, so I can't tell you if it's the same thing or not. It is also used to make Filipino-style spaghetti. If using pork for the barbecue, add some 7-up to the marinade, completely optional. Yes, the soda. It will add flavor. (edited to add: 7-up also helps tenderize the meat)

This will serve 2-3 people. For larger quantities, adjust marinade/sauce accordingly. What makes this kind of barbecue stand out is definitely the marinade/sauce and the char from the grill. It's one that you'll never forget. Plus, the easy portability of it.


Pinoy Style BBQ

1 lb chicken tenders or 1 lb pork butt (cubes or stripes)
1 yellow bell pepper (cut into 1" squares)
1 red bell pepper (cut into 1" squares)
1 medium sweet onion (quartered and separated)
1 small can pineapple chunks

BBQ skewers

Marinade/Sauce:
1 c soy sauce
1 tsp ground pepper
3 garlic cloves (minced)
2 Tbsp brown sugar
2 Tbsp Lemon, Lime or Calamansi juice
1/2 can 7-up (optional, if using pork)
1/2 c Tomato Ketchup or Banana Ketchup

Combine the soy sauce, garlic, lemon or calamansi juice, pepper, brown sugar and the optional sprite. Pour over you meat of choice and marinate for at least 30min to an hour. It's even better if you marinate overnight.

Soak the skewers in water for at least 5 min before skewering the meat. This will keep the wood from burning while cooking. Skew the meat leaving at least 2 inches at the bottom for handling.

Then skewer the bell peppers, onion and pineapple in alternating order, also leaving room at the bottom of the stick.

Do not throw away the marinade from the meat. This will become the sauce for basting. Add in the ketchup and mix well. Set aside until you are ready to grill.

Prepare and heat your grill whether be stove-top or outdoor. Cook the "meat" skewers first for 3-5min then flip and baste really good. Cook for another 2-4 min. Flip and baste again. Get a good char on the meat. (Makes it crispy) Remove from heat and let rest for 2 min to let juices redistribute. Adjust the the timing to get a nice char on both side.

Then grill the bell pepper skewers in the same method as the "meat" skewers.

Note: The marinade/sauce can also be used as a dip.

To BBQ in the oven: Heat the oven 350˚F. For chicken, place on in a baking pan and bake for 20 min. Half way turn and baste. Then baste again before removing.
For pork, do the same as the chicken but for 30-40min. Or until you see a slightly charring of the meat.


Thursday, May 28, 2009

Shrimparagus Garlic Mac'n'Cheese


Comfort food with a twang. That's what I like. Mac and cheese would be the ultimate comfort food in my book. It doesn't get any more of a classic than that. And what a better time to make some than on Memorial Day weekend. I like my mac and cheese very cheesy, but I hate it when the cheese is too runny. Creamy, I'll take. But runny...? I made just the right amount to cheese sauce to coat each piece of pasta, shrimp and asparagus that still had a nice little stretch when you pull a piece with a fork.

For the pasta, I used Barilla's Whole Grain Rotini. I also used evaporated milk rather than heavy cream for the cheese sauce and added a some tobasco to give it a itty-bitty kick. Cutting out some calories while having a good and tasty meal is always good.

This could serve 3-5.


Shrimpargus Garlic Mac'n'Cheese

1 lb shrimp (deveined and shelled)
1 box Barilla Whole Grain Rotini pasta
1 bundle thin asparagus
Salt
Pepper
Paprika
Extra Virgin Olive Oil

Bring a stock pot, filled with water, to a boil. When the water is bubbling like crazy, season liberally with salt and add in the pasta. Cook for about 10-12 min. Stir a couple of times to keep the pasta from sticking to the pot. Drain before adding it to a 13 x 9 baking pan.

Rinse the asparagus and cut off 1" from the bottom tip. Then slice the remaining sticks in the length of a toothpick.

Heat some olive oil in a pan and saute the asparagus for roughly 5 min or until tender. Season with some salt and pepper. Remove from heat and mix with the pasta.

In the same pan, heat a little more olive oil and saute the shrimp until pink and opaque. Roughly 3-5 min. Season with salt, pepper and paprika. It will get a nice red tint. When shrimp is ready add into the pasta and asparagus including the juice in the pan.


Cheese Sauce:
1 12oz can evaporated milk
1 1/2 c Shredded mild cheddar (plus extra for topping)
1 1/2 c shredded parmesan (plus extra for topping)
1-2 tsp tobasco
3 garlic cloves (minced)
1 Tbsp butter or margarine
1 Tbsp All-Purpose Flour


In a small sauce pan, melt the butter, then add in the flour on medium to low heat. Stir. Add the evaporated milk. Stir to combine until milk looks thick and flour pieces have dissolved. Add in both cheeses and stir to combine. Add in the garlic and tobasco. Stir well until cheeses are completely melted.

Note: You can adjust how much garlic and tobasco you want put in


Putting it all together: Preheat your broiler. Spread the cheese sauce over the pasta mixture and mix the whole concoction together, coating every nook and cranny. Sprinkle extra cheddar and parmesan over the top. Place in the broiler for 3 min or until the cheese is melted.


Wednesday, May 27, 2009

Sweet Wonton Crisps


So you've got all these leftover wonton wrappers. What do you do? Make more dumpling? Nah. I've got a fun solution to change it up a bit.

I had a few wrappers left from those potstickers and I didn't want them to go waste or just sit in the fridge. I thought of those fried wonton strips that some Chinese restaurants serve as a starter or over some entrees. As many of you know, I try to avoid deep-frying as much as possible. So it was off to the oven. I threw in a tiny twist as well by adding a little sweetness. So I dipped them in some of the left over egg wash and sprinkled a cinnamon mixture over the top and baked for 5-10min. Ta-da!! Crisps. Fun little treats these are. Serve them as a garnish over some ice cream, if you'd like. I had cut the wrappers into strips, but you make cut them into any shape that you like. Or just leave them whole.

The recipe below is made using 3 wontons wrappers, so if you're going to bake a bunch, adjust accordingly.


Sweet Wonton Crisps

wonton wrappers (cut into slices or left whole)
1Tbsp ground cinnamon
1 Tbsp ground nutmeg
1 Tsp Sugar
1 Tsp Brown Sugar
Egg wash: 1 egg beatn with 2 Tbsp water


Preheat oven 400˚F

Mix together cinnamon, nutmeg and both sugars. Set aside.

Baste both sides the wonton wrapper and place on a non-greased baking sheet. Sprinkle some of the cinnamon mixture on top.

Bake for 5-10min or until golden brown.


Tuesday, May 26, 2009

Baked Squash Potstickers


Another appetizer, I know. In a way, they can be considered a meal, if it's the only thing that you eat. These little Asian dumplings somewhat fulfilled my craving for some dim sum as of late. I remember I had some frozen cooked squash in the freezer that I didn't know what to do with. I could have made soup, but the weather was telling me to do something different. Really who wants soup on a nice sunny day? It doesn't necessarily scream "SOUP." Finger food would be best and what a better way than with some baked potstickers. These are really good and healthy too.

Served with a simple soy sauce dip. This makes roughly 2 dozen little pouches.


Baked Squash Potstickers

1 small box/bag frozen cooked squash (defrosted)
24 wonton wrappers
salt
pepper
1-2 Tbsp dry oregano
1-2 Tbsp dry parsley
2 garlic cloves (minced)
Egg wash: 1 egg beaten with 2 Tbsp water


Preheat oven 400˚F

Saute the garlic in some olive oil in a heated pan. Add in the squash as well as the oregano and parsley. Stir well to combine. Season with some salt and pepper. Cook for 5-8min. Remove from heat and let it cool.

Take a wonton wrapper and baste the edges with the egg wash. Place a dollop of the squash mixture in the center, then bring the edges together. Pinch to seal it shut.

Baste the finished potsticker with some of the egg wash on all sides and place on a lightly greased making sheet. This will help cook the bottom and keep it from sticking.

Bake for 10-15 min.


Soy Sauce Dip

2 Tbsp Soy sauce
1 tsp Lemon Juice

Combine ingredients together.

Enjoy!


Monday, May 25, 2009

Memorial Day Off

Happy Memorial Day. It means the start of summer and a signal to dust off those outdoor grills, if you have one. Eat well and enjoy the day. Chug down a few beers. Go to the beach or chill in your yard or porch.

I'll maybe do some writing, soak up some sun, basically try and have a lazy day.

So, I will see you all maƱana!!

Enjoy the beach pic below. I've always like this shot. It's from my trip to Boracay Island (Philippines) a few years ago.

Sunday, May 24, 2009

Cooking Tip of the Day

I realized that it's been a while since I've posted a cooking tip. So here is today's cooking tip. It may or may not be useful to your cooking life, but at least you'll know it for future reference.


You have probably heard of several cooking tips on how to make brown sugar soft again. Well here is one that I like: Put a slice of bread in the package and seal tightly. The sugar will absorb the moisture from the bread and soften up after a few hours or overnight.

Source:
http://www.cooking-mexican-recipes.com/cooking_tips.html


A little side note:
I just want to acknowledge a couple of awards that I received this past week. The first one is from Rebecca from Chow and Chatter. Thank you very much for the award. Special shoutout to her today. Please check her blog out.


The second one is from Heavenly Housewife from Donuts to Delirium: My Life As A Housewife. Special shoutout to her today as well.

The rules of this award is that I pass it along to ten blogs that I have recently discovered. Then, those recipients should do the same.


So here is the ten:

Lisa is Cooking

Bonne Nuitrition

Girlichef

Elra's Cooking

A Blog About Food

Julie Jams

My Tasty Treasures

SheSimmers

Tasty Eats At Home

Pig Pig's Corner


Enjoy!

Saturday, May 23, 2009

Mushroom Croquettes


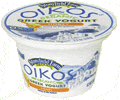
Fun little appetizers, starter or snack. I was about to try making something with mushroom and pureed squash, but my brain wasn't up for making any type of sophisticated recipe. Rather than using an egg as a binding agent I used some Greek yogurt as well as serving this with a yogurt dip. I received a couple of coupons in the mail from Stoneyfield Farm Organic for their Oikos Greek Organic Yogurt.

I don't usually use yogurt for cooking I usually just eat it with some granola for breakfast or snack. So, I decided to give it a try, buying one 5oz cup. I used half in the mushroom mix and the other half for a dip. This would be good also with sour cream, if you'd prefer. It's pretty good. I have a couple more coupons, so I'll be using those soon.


This will make 6-8 croquettes. I had made 8, but you only see six in the picture because I had eaten two. I have to try it out just to make sure it's blog-worthy, right?


Mushroom Croquettes

2 Large Portabello mushroom caps (chopped)
Salt
pepper
paprika
3 oz sour cream or yogurt
1 Tbsp Butter or Margarine
1 Tbsp Extra Virgin Olive Oil (plus extra)
Panko crumbs

In a pan, melt the butter and heat the oil. Saute the mushroom until they darker in color and tender. Season with salt, pepper and paprika. Roughly 5-8min on medium heat.

Remove from heat and let it cool completely. Then mix in the sour cream or yogurt. Form into balls or whatever shape you'd like and coat completely with panko crumbs.

Heat some oil in another pan. Pan-fry the balls 2-3min each side. It will have a nice crispy crust on the outside and tender and flavorful on the inside. Place on a paper towel to drain any excess oil.


Garlic Herb Yogurt Dip

4 Tbsp yogurt of choice
1 Tbsp Oregano
1 Tbsp Parsley
1 Tbsp Garlic Powder

Combine ingredients together.


Friday, May 22, 2009

Tuna Casserole with Roasted Eggplant


Don't be fooled by the look of this creamy glob of deliciousness. It may not have a pretty plating but the taste is worth it. I saw the original recipe on the back of a Campbell's Cream of Celery soup can and I had gotten a bunch of tuna from my last trip to Costco. I figured this was a good way to two use of those cans. Besides, tuna salad gets boring after a while. So here's my take on it. Rather than using curly egg noodles, I used small shell pasta.

Creamy, delicious, with some fresh herb-roasted veggies.


Tuna Casserole with Roasted Eggplant

2 5oz can tuna in oil.
1 small can Cream of Celery soup
2 medium eggplant (cubed)
1/2 medium onion (quartered and separated)
1/2 c milk or 1 small can of evaporated milk
Extra Virgin Olive Oil
2 large garlic cloves
1 Tbsp Dry Basil
1 Tbsp Dry Parsley (plus extra)
Salt
Pepper
2 c Pasta (of your choice. Rough estimate.) - I used small shells
1 c Panko Crumbs


Preheat oven to 450˚F

Toss the cubed eggplant and onions in a generous drizzle of olive oil with the dry basil, dry parsley, salt and pepper.

Place on a baking sheet or roasting pan along with one garlic clove at each end and put in the oven for 30-40 min.

While the eggplant is roasting, bring a stock pot full of water to a boil. Season the water liberally with salt and cook the pasta to al dente (roughly 10min). Then drain excess water.

Remove the oil, but not all from the tuna and shred the meat.

Once the pasta is done, place into a casserole and add in the cream of celery soup, milk and tuna. Mix thoroughly to combine.

When the eggplant and onion are done, add them into the pasta mixtures. Again mixing thoroughly to combine. Sprinkle the panko crumbs on top and some fresh or dry parsley.

Bake for 20min on a 400˚F oven.


Thursday, May 21, 2009

Open-Faced Roasted Green Bean Sammie


Not much of a story to tell on this one. I was just hungry. That's about it. A simple meal for a semi-hectic day. Another variation on the green bean and tomato combination. A yummy open-faced sammie with a hot avocado spread and melted manchego cheese.

The avocado spread has just a nice little kick to it from the hot sauce that it adds to the sandwich. Sooo delish! You can cut up the green beans, if you don't want to have to bite into them while eating.


Open-Faced Roasted Green Bean Sammie

1/2 lb Green Beans (washed with ends removed)
2 Medium Tomatoes (quartered and deseeded)
4 Slices of your bread of choice
Cheese (slices or grated. I used manchego)
Extra Virgin Olive Oil
1 Tbsp Dry Basil
1 Tbsp Dry Parsley
Salt & Pepper to season


Preheat oven to 450˚F

In a large bowl, toss the green beans and tomato with a nice long drizzle oof olive out coating each piece. Add in basil and parsley. Toss to combine. Season with some salt and pepper. Toss again.

Place on an ungreased baking sheet and bake to 20-25min. Half way give the green beans a little stir to let it roast evenly.


Hot Avocado Spread:
1-2 Tbsp Hot Sauce
1 large avocado (mashed and pitted)
1 Tbsp Dry or fresh chopped Basil
1 Tbsp Dry or fresh chopped Parsley
Juice of 1 lemon

Combine all ingredients together into a mash. You may add more or put in less hot sauce to fit your preference.


Putting it together: Preheat the broiler. Take a slice of bread (toasted or untoasted) and spread on a nice helping of the hot avocado spread followed by some of the roasted green beans and tomato. Top with some cheese. Place the sammie in the broiler for a few minutes until the cheese is nice and melted.


Wednesday, May 20, 2009

Asparagus in a Blanket with Cheese Sauce


I've been using a lot of chicken tenders lately because I had gotten a 5lb bag from Costco. Everything there is in bulk. So I'm trying to think of different ways to use those tenders aside from the obvious, which I will do, too. I figured why not use them as a wrap for some thing. I butterflied and pounded the tenders close to the thickness of bacon and wrapped them around some thin asparagus. As much as I love bacon, trust me...I could go for a bacon sandwich any day, we sometimes have to go for an alternative.

Very tasty. The top tips have a little crisp crunch to them. The body of the asparagus tender with a slight crunch at the center. The chicken baked just right and topped with some of the 4 cheese sauce. I ate 3 little bundles and it was the right amount to fill me up. Not the "guilty" full, but the "satisfied and just right" full. I still had room for dessert (i.e. leche flan). If using thicker asparagus, it'd be best to blanch them first.

This will make 6 bundles.


Asparagus in a Blanket with Cheese Sauce

6 Large chicken tenders
1 bundle thin asparagus (roughly 30)
Paprika
Salt
Pepper
Extra Virgin Olive Oil
Juice of half a lemon (optional)


Preheat oven to 350˚F

Wash and cut the bottom ends of the asparagus off. In a bowl, toss them in some olive oil and season with salt and pepper. Set aside.

Carefully butterfly the chicken tenders. (Cutting it from the side middle like a book. Be sure not to cut all the way through you still want it to be one piece.)

Then place the tenders in between two piece of plastic wrap and pound it a few times into a thin piece. I use the bottom of a pan since I don't a have a mallet.

Remove from plastic wrap and season both side with salt, pepper and paprika.

Take 4-5 asparagus sticks and wrap it in a slight angle in the pounded chicken. Like in a twist.

Place on a lightly greased baking sheet, ends facing down to keep it from unraveling while it cooks. Drizzle a little olive oil over the chicken.

Bake for 20 min.

Cheese Sauce:
1 Tbsp Butter
1 Tbsp All-purpose Flour
1-1 1/2 c milk or 1 12oz can of evaporated milk
Shredded cheese (I used Sargento 4 cheese Mexican mix with Monterey Jack, Mild Cheddar,
Queso Quesadilla and Asadero cheeses)
Salt & Pepper

Melt the butter in a sauce pan. Add in the flour and stir to combine making a roux. It'll clump together. Then add in the milk. Stir to combine and melt the flour mix. Once it looks a little thicker add in the shredded cheese.

Stir occasionally until the cheese is melted and has a creamy consistency. Season with a little salt and pepper.

Putting it all together:
When the chicken and asparagus are done place on a plate and pour some of the cheese sauce on top. The cheese sauce is also good for fondue.

Enjoy!

Tuesday, May 19, 2009

Leche Flan


Flan. A classic dessert. In the Philippines it's usually called leche flan. It's the same name either way. Flan is flan is flan. I won't go into world history of it. Oyster Food & Culture would probably do a better job at giving you a descriptive history of this sweet dessert. I just eat them.

In the fridge were 4 egg yolks. I had tried making some meringue earlier in the week, only to have it end up being an epic fail. I was about to make an egg yolk scramble, but my mom had suggested leche flan. Ah, yes! One of my favorite desserts of all time. It was also something she had seen her ninang (pronounced nee-nahng, meaning godmother in Tagalog) cook many times before when she was a child.

The last time I had some was when I was in the Philippines exactly a year ago. My aunt makes then SUPER delicious. Getting a hold of those small tin can pans and diving in into the custard with all that syrupy goodness underneath. I was in heaven! This is how my mom remembered it and my interpretation in creating it. The result is one that brings back fond memories of her hometown.

The lemon adds a balance to the sweetness of the syrup. The key to making this is "low & slow".

This will make 3-4 small individual serving.


Leche Flan

Caramel syrup
1/3 c sugar
1/4 c water

In a sauce pan, melt the sugar over low flame until it's melted into a brown caramel liquid. make sure to stir occasionally to keep it from burning. There shouldn't be any lumps of sugar left. When it's fully liquefied, slowly add in the water. Not all at once. Then stir until the it forms into a syrup-like consistency.

Here's a good way to know when it is ready. Scrape a line down the center of the pan with a wooden spoon and if it takes a while for the syrup to cover the open gap your syrup is done. Don't ever cook it or at that point your making candy.

Then take 4 small tart containers or mini load pans and pour a nice layer of syrup in each. Make sure to coat the bottom evenly and let it harden. Set aside.


Custard
1 c evaporated milk
4 egg yolks (beaten)
1/4 c sugar
1/2 tsp lemon juice

Combine all ingredients into a small sauce pan on a low flame and stir constantly until sugar is dissolved and the mixture is slightly heated. Roughly 10-15min. Stirring constantly will help avoid the egg yolks turning into scramble yolks and combine all ingredients together. Then strain the custard mixture well into a bowl to remove any egg bits that may have cooked. Then ladle the mixture into the tart cups or mini loaf pans.

Cover the tart cups with wax paper or parchment paper and place in a steamer for 1 hour or until the custard is firm to the touch.

Note: You may use the water bath method if you don't have a steamer. Place the the tart cups in large deep roasting pan and put in an oven preheated to 325˚F. When the pan is in the oven, fill it with lukewarm water half way up the tart cup or mini loaf pan. This will prevent cross contamination of water and custard. The bake for 1 hour or until custard is nice and firm.


When finished, let it cool before placing on a plate. Serve with some ice cream or if you're going the Filipino-style serve with some Halo Halo. (I'll be doing that dessert soon.)


Monday, May 18, 2009

Cinnamon Almond Biscookie


What do you think? Is it a cookie or a biscuit? Tastes like a cookie, but looks like a little biscuit. Can't really be a biscotti because it isn't crisp on the inside and is only baked once. So I shall call this a biscookie. A hybrid of the two.

I made these to inaugurate the new cooling racks that I had won from a giveaway from Evil Shenanigans as you may have seen in my post the other day. I also needed to use up some leftover almond slices I had in the pantry.

A subtle hint on cinnamon with a taste of almond. Goes well with a cup of joe and/or a cold glass of moo juice.


Cinnamon Almond Biscookie
1/2 c butter or margarine
1/3 c sugar
1 egg
1 1/2 c cake Flour
1 Tbsp ground cinnamon
1 tsp vanilla extract
1/2 c Almond slices
1 tsp baking soda
1/4 tsp salt

Preheat oven 350˚F

Sift together flour, baking soda, salt and cinnamon.

In a bowl, cream together butter and sugar. Then beat in egg and add the vanilla. Add in the flour mixture and mix well.

Then mix in the almonds. Divide into 12 equal rounds and place on a lightly greased baking sheet.

Bake for 12-15 min.

Sunday, May 17, 2009

Racks are cool and friends are too.


Sunday equals a lazy day. So this will be relatively short.

I recently won a giveaway from Evil Shenanigans. The prize...these awesome foldable and stackable cooling racks. I already have a couple round racks for cakes, but this is just what I needed for when I make cookies and bread and other baked goodies. It's a good thing too because I was just asked to bake a little something for a friend who's participating in a March of Dimes event. So I guess it's perfect timing. Thanks, Kelly!

I eagerly wanted to make something quick, you'll see from the pic some bread. I made a wheat version of the French Bread. The treat is on the top rack. Those yummy plump looking things. Recipe to follow. Maybe tomorrow? You'll just have to come back and find out. But I thought this pic would be a nice little teaser for you. Make sure you have a cup of coffee or a glass of cold milk on hand because it's a perfect companion for it.


Also, Rebecca at Chow and Chatter and Sweta at Bonne Nutrition were gracious in giving me the Friend award a week ago. Thank you for the recognition. I greatly appreciate it! Be sure to check these lovely ladies out as well as others in the blogroll, too.


Lastly, if you're looking for something else to read that's not food related, I also write another blog called The Misadventures of Little J. It's a weekly blog with postings every Sunday with occasional spontaneous posts as well. Stop on by and check it out. It's my ramblings on everyday life and, of course, entertainment related things.

Happy Eating!!

Saturday, May 16, 2009

Pineapple Vinaigrette


Something a super simple today. It's the weekend. Weekends have to be easy and simple. When I opened the can of pineapple bits, I had all this lovely juice that came along with it. I didn't want to waste the tasty liquid. I usually drink it straight up, but I wasn't in the mood. So my other alternative was to make a dressing.

You can't tell too much from the pictures but the vinaigrette is on there over the avocado, tomato, romaine heart, baby cucumber and cheese.

It's a nice change from the usual the balsamic and honey-mustard vinaigrette.


Pineapple Vinaigrette

5 Tbsp Pineapple Juice
4 Tbsp Rice Wine Vinegar
4 Tbsp Extra Virgin Olive Oil
pinch of Salt & Pepper to season

Combine all ingredients and drizzle over you mix of greens. You can adjust the amount according to your taste. Enjoy!

Friday, May 15, 2009

Teriyaki Pizza


I did it!! I finished my script!! I wrote it in exactly one week. When I finally typed the words "The End," I wanted to cry. But I didn't. It's not yet perfect by any means. I am just relieved to get the first draft out and done. What does this have to do with food, you ask? Well, as with any accomplishment, you have to celebrate.

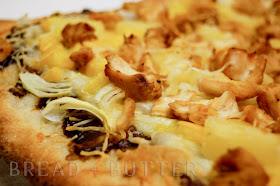
So to celebrate, I made myself a pizza. A teriyaki pizza. I can imagine the people at CPK quivering at the knees. (*insert evil laugh*) I used my glaze recipe as the sauce, but substituting minced garlic for the garlic powder. I also didn't have enough time to make my own dough, so I used the Pillsbury pizza crust instead. You can use other pre-made dough of your choice or make it from scratch.


Also last month, I received some seasonings in the mail. You may have seen some other bloggers write about these as well. I've lagging on using them. Amazing Taste. Appropriately named because it quite amazing. I used their Malibu seasoning. It contains ingredients similar to what I usually use when I season poultry. I cubed up some chicken tenders and coated each piece liberally and let it sit for 5-10 min to let the flavors soak into the pores of the meat and pan-fried them. I really liked it. It puts a nice "zing" to a somewhat bland chicken. Amazingly enough the flavors of the seasoning blends well with the other flavors of this pizza. Not overpowering. The meat itself was still juicy. It was really like a medley in your mouth and they were doing a hoedown. Check out their site (here) to see where you can get yourself some. And they're relatively cheap. Cheap is good.

All in all, a satisfying celebratory pizza.


Teriyaki Pizza

1 can Pillsbury pizza dough or your choice of premade dough.
4 large chicken tenders (seasoned and cubed)
1 large bell pepper (chopped)
1/2 medium onion (sliced)
1/2 c pineapple bits (no juice)
shredded cheese of your choice (I used 4 cheese mix from Sargento)

Teriyaki Glace/Sauce:
3 garlic cloved (minced)
1/3 c Soy Sauce
1/3 c Rice Wine Vinegar
4 Tbsp Brown Sugar
1 Tbsp Cornstarch dissolved in 2 Tbsp Water


Preheat oven 375˚F

Season the chicken pieces with Amazing Taste seasoning or your seasoning of choice. Let it sit for 5-10min to let the chicken "marinate."

In a small saucepan, heat some olive oil and saute the garlic until almost brown. Then add in soy sauce, vinegar, cornstarch, brown sugar and heat until thickened. Set aside.

In another pan, coat the bottom with oil and heat. When hot, cook chicken roughly 5-8 min per side. Once cooked, remove from heat and let it cool to redistribute juices then shred into pieces.

Roll out the pizza dough onto a baking sheet and spread the teriyaki glaze/sauce. Be sure to leave a little room for the crust. Then layer on the cheese, bell pepper, onions, pineapple and chicken. Lastly sprinkle a little bit more cheese on top.

Bake for 15-20 min or until crust is golden brown.

CPK, eat your heart out!!!