Monday, August 31, 2009

Lime Pudding Tarts


This was supposed to be my entry for the Lime BSI a few weeks back that was hosted by Jen at My Kitchen Addiction. The first time I made it I made the mistake of leaving out any support for the graham cracker base.  When I tried to take them out of my mini-muffin pan, it all fell apart. Sure I was a wee bit disappoint that it failed, but the great thing about food is that you can keep trying until you get it right. The mistake I made the first time was not using some sort of paper lining to help ease in removal. Imagine the me trying to pry them out with a fork from my mini muffin pan. It was a nightmare. But I was determined to make them again. And make them again I did!

These tarts are relatively easy to make. Perfect for parties or as a simple dessert after a meal. It uses a graham cracker base. I cheated a little on the graham cracker tart crusts for this go around. I saw these individual mini crusts at the grocery from Keebler and I figured that I'd give them a go. Save me some time. You can use your own or use the premade stuff. I included my recipe for making the graham cracker base from scratch in the recipe below.  The pudding is just regular store bought vanilla pudding spiked with lime zest and 1/2 lime juice. A nice subtle tart taste. Then chill for a bit and enjoy. Add fruit to the top and make it into a fruit tart. It reminded me a bit of key lime pie. Yum!


Makes 4-6 tarts. Adjust accordingly.


Lime Pudding Tart

1 box vanilla pudding mix
2 c milk
zest of 1 lime
Juice of 1/2 lime
fruit (optional)

base:
3 c crushed graham crackers
1/4 c unsalted butter
1 Tbsp Cinnamon
2 Tbsp granulated sugar

4-6 4-inch tart cups or cupcake cups.

Note: you can use the premade mini graham cracker tart crusts if you're short on time.

Preheat your oven to 375˚F

For the graham cracker base, combine the ingredients in a bowl and mix until blended and resembles a crumb consistency. You can also do this in a food processor.

Divide the graham cracker mix evenly among the tart cups and mold up to the sides until it resembles almost a small bowl.

Bake in the oven for 5-10 min. Let is cool completely after.

While the crust bakes, make the pudding according to the directions on the box. Mix in a large enough bowl and add in the lime zest and juice. Stir well to combine.

Then take the pudding mixture and dollop at least 2 big spoonfuls into the tart cups. Top with a slice of lime and/or some berries and place in the fridge to keep cool.


Sunday, August 30, 2009

Cucumber Salad


Today is just a little simple easy salad. Perfect as a side dish or an appetizer. I had bought some Persian cucumbers from the farmer's market. I had almost forgotten that I had them, too. Eek!!

Anyway, this salad is perfect for those who don't want to eat those leafy greens. Just the word "salad" brings fear into people's eyes. Add the word "cucumber" and maybe it will ease their minds a bit.  It's not as bad as some of you may think. Salads are good and healthy. I like to eat at least 2-3 times a week depending on the menu I have planned.  Besides, salads don't always have to be made from lettuce.

I scooped out the seeds from the cucumbers and sliced them into half moons. I let it marinate in a dill vinaigrette for 5-10 minutes to let the flavors soak into the cucumber. This is one salad that can be made in advance.

Serves 2


Cucumber Salad

5 small persian cucumbers or 2 long cucumbers

Dill Vinaigrette
3 Tbsp rice wine vinegar
3 Tbsp olive oil
1/2 tsp sugar
1 Tbsp finely chopped fresh dill
salt


In a bowl, whisk together the rice wine vinegar, olive oil, sugar and dill. Season with a pinch of salt.

Take the cucumbers and cut them in half length wise. Quarter them, if needed.  Scoop out the seeds and discard. Slice the halves into 1/8-inch half moon slices.

Place in a large bowl and drizzle over the vinaigrette mixture. Let the salad stand for roughly 5-10 min to let the vinaigrette marinate the cucumber slices.

Saturday, August 29, 2009

Mushroom Jalapeño Pita Sammies


An easy sammie only takes minutes to make. I was pretty much in a jam to make something as I wasn't feeling like my usual self. Maybe it was because I was hungry. Yeah, that's usually the case.  I took it upon myself to make a quickie sandwich. I had some mushroom leftover from the Roasted Eggplant and Mushroom Soup, so I got that out along with some plain Greek yogurt I needed to use up. If you remember my mushroom croquettes, it's a bit similar to that. I combined them with the yogurt along with freshly roasted jalapeño peppers and I was good to go. I used my George Foreman grill to heat it up and give it a little press. That's optional. You can eat it straight up as the mushroom are still warm after the saute.

I have to admit that it was an interestingly odd combination. But I like it. Mushroom and peppers. They go well together.

Serve 1-2


Roasted Jalapeño and Mushroom Pita Sandwich

1 c sliced white mushrooms
2 large jalapeños (or peppers of your choice)
2-3 Tbsp plain Greek yogurt
1 pita bread (divided in half)

Note: you can use the canned roasted peppers, if you don't feel like roasting your own.

Preheat your broiler.

Place the jalapeño peppers on a baking sheet and roast the until the skins have blackened. Give the peppers flip to roast the other side.

Let the peppers cool and gently remove the skin and the seeds, if you don't want the heat. Shred the peppers into pieces. Set aside.

In a pan, saute the mushrooms in some olive oil until until tender and slightly darkened. Season with a pinch of salt and pepper. Remove the mushroom from the pan and mix in the yogurt and add the shredded pepper.

Mix together then take a couple spoonfuls and stuff it into the pita bread.

You may heat the pita bread for a few minutes in a 350˚F oven and wrapped in foil

Enjoy!

Friday, August 28, 2009

Gnocchi


I had some baby potatoes I needed to cook, but I didn't want to have the usual roasted veggie kind. I've seen several recipes of this potato pasta concoction floating around the blog-o-sphere, that I had to eventually give it a try for myself. Gnocchi (knee-okkee). These little pasta dumplings of deliciousness are made from potato and the usual pasta ingredients of egg, flour and salt. I've had this before at restaurants, but have never made them at home. After my first experience with making pasta (here), I wasn't sure I would never try making anything related since. You can view the little history of this on its wikipedia page.

I searched the interweb for a good recipe. Most that I saw were nearly identical. So I mixed and matched to fit the amount of baby potatoes that I had. Peeled, boiled, then mashed the potatoes by hand, but I was left with tiny bit chunks that I missed. (Note to self: add potato ricer to Christmas list.) Mixed in the egg and salt, then added the flour. It still held a dough form, which was good. Molded the dough into round sticks then cut them into little bitty pillows. I made two sizes - fifty-cent piece and nickle sized, give or take.

You cook these like you would with regular pasta. Boiling salted water and just dump them in. At first, they'll sink, but the great thing about these is that they will float to the surface when they are ready to come out.

You can serve this with which ever sauce you desire. At first, I couldn't decided what kind I would make. I tweeted my semi-dilemma on twitter and got some pretty good suggestions. I decided on a simple browned butter garlic sauce and right before eating I sprinkled some grated parmigiano reggiano. I have to work on shaping these little guys, but I'm happy with the way they turned out. Not bad for my first try, eh?

Serves 2-3


Gnocchi with Browned Butter Garlic Sauce

1 large potato or 10 small baby potatoes
1 c flour plus extra for dusting
1 egg
1 tsp salt

note: recipe for the sauce below


Note: To make a wheat version replace with 1/2 c white and 3/4 c wheat flour.

Peel and cube the potatoes. Remove any blemishes it may have.

Boil the potatoes in a pot of salted water until they are cooked through and tender. A fork should easily piece it.

When the potatoes are ready mash them in a bowl with a ricer. If you don't have one, you can mash them with a fork or by hand.

Mix in the egg and salt, then slowly add the flour. Turn out the dough onto a well-flour surface and knead it a few time.

Cut a small chuck of the dough and mold it into a long stick. Take a knife or fork and cut the stick into little dumpling. Place them on a floured tray and keep separated. They will stick to each other.

Bring a pot of water to a boil. Season liberally with salt. When the water is ready, place in the gnocchi. They will first sink, but when they are ready they will float to the surface. Remove with a slotted spoon to drain off the excess water.

Serve with your choice of sauce.

Browned Butter Garlic Sauce
1/3-1/2 c butter
1 garlic clove (minced)
salt
pepper

In a sauce pan, melt the butter on medium heat. Bring it to a slight boil and remove any foam that forms on top. Stir or shake the pan on occasion until the butter has browned. Turn off the heat and season with a little salt and pepper. Let the butter cool slightly before adding the garlic or it will cook and burn.

Spoon the sauce over the gnocchi or pasta.

(You can omit with garlic to make a regular browned butter sauce)


Thursday, August 27, 2009

Roasted Eggplant and Mushroom Soup


Soup during summer isn't so bad. Just not on days when it is extremely hot and humid. Several days ago, the weather almost seemed like autumn was giving us a sneak peak. I couldn't resist making myself some soup and a little sneaky peak at what I'll be trying to dish up when the season changes.

Soup it was. But what kink of soup? I rummage through the vegetable compartment of the fridge and find myself some long eggplant. Yes, I think that's what I'll make. I still have several cans of veggie and chicken broth from a sale at the grocery. I chose the veggie broth. Keeping this one vegetarian. For the non-veggies, you can use chicken broth, if you'd like. A small can of evaporated milk and a can of fire roasted tomatoes. (One regular tomato would suffice.) I was missing a couple other ingredients, so I made a quick field trip to Whole Food. Walk through the produce section and grab myself a nice BIG onion. I could use the other portions I won't use for another dish. I pass by the mushrooms and grab myself some prepacked sliced white mushrooms. A nice addition to the soup. I round the aisles and get a few more non-soup items, pay for them and head home to make the meal.

I'm one of those who doesn't like soups to be all watery liquid. Don't get me wrong, I still like them, but I prefer them to have some type of chunky subtance if it's going to be that consistency. So I get home, roast the eggplants for in the broiler, then scoop out the meat from the skins. I chop up the mushrooms, pop open cans and begin cooking.

Once I got everything together, I couldn't wait to eat. I oven-toasted some sandwich rolls that I spread some freshly made basil oil. Ladled the soup and chunky bits and enjoyed an autumn dinner.

Serves 2-3.


Roasted Eggplant and Mushroom Soup

2 medium long eggplant
1 12oz can vegetable broth
1 1/2 c chopped white mushrooms
1 medium tomato - chopped and deseeded or 1/2 can tomato chunks - minus juices)
3 cloves garlic - minced
1/2 medium sweet onion - sliced
1 5 oz can evaporated milk
salt
pepper
olive oil

Preheat your oven to 425˚F

Cut the eggplants length-wise and coat all sides with olive oil. Roast for 30 min until slightly brown on top. When roasted remove from oven and let cool for 5 min before handling. Scoop the meat of the eggplants out discard the skins.

While the eggplants are roasting prepare the vegetables.

Put a light drizzle of olive oil in a pot. Saute the garlic for 30 sec, then add the onions. Suate them until they are limp and translucent. Then add the chopped mushrooms. Cook until slightly browned. Season it lightly with some salt and pepper. Add the tomatoes and eggplants. Stir occaionally.

Finally, add the chicken broth, then the evaporated milk. Stir to combine and let it simmer for 2 minutes. Add more salt, if needed. Turn off the heat and serve.


Wednesday, August 26, 2009

Sesame Crusted Seared Tuna Sammies


I had gotten some fresh albacore tuna steaks from the farmer's market over the weekend. As I mentioned before, Sunday's I usually try to make some "elegant" or "eleborate." At least, I try to. These were sushi grade tuna, so I was freakin' excited to cook up some seared tuna sammies at home. It's been a LONG while since last made this. I usually use a nice ahi, but albacore is good, too. This was one of the dishes where I knew I loved food more than I should.

I have made two kinds of tuna sandwiches before and here's one. The package I got had two sizable cuts. I only used one of the cuts for the sanwiches. The other half I turned into sashimi. Mmmmm... I tried to cut them neatly and precise as possible, but I ended up cutting them into different scraggly pieces. It still tasted fantastic though. I wish I had some wasabi and pickled ginger to go along with it.


Back to the sammies. I cut the tuna into 2-inch thick bricks. Did a quick dip in some soy sauce to sort of marinate them and seasoned all sides with salt and pepper. Then fully coated them in sesame seeds. Seared them in some really hot oil for about 30 sec. Fresh fish will cook pretty quick, so they don't take long to cook.

I made a ginger mayo spread to go along with this as well as using some coleslaw as the "leafy greens" part. You can use lettuce, if you'd like. Placed then in a sandwich roll and dug in. The sandwich was really good. I can't remember the last time I had seared tuna, but I'm glad I made the choice to get it.


Makes 3-4 sammies


Sesame Crusted Seared Tuna Sammie

1 fresh tuna steak (sushi grade albacore or ahi)
sesame seeds
salt
pepper
soy sauce

Ginger Mayo:
1 tbsp fresh minced or grated ginger
1/2 c mayo
2 tsp lemon juice

coleslaw or pieces of lettuce
bread rolls


In a skillet, heat some olive oil and saute the ginger for 30 sec. Remove from the pan and into a bowl. Add the mayo and lemon juice and mix to combine. Set aside.

Cut the tuna into 2 inch thick blocks. Lightly marinate the pieces in some soy sauce for 10-15, then season all sides with a little salt and pepper. Finally, coat with the sesame seeds.

Heat some more extra virgin olive oil in the same skillet you sautéed the ginger. When the oil is hot enough, place the tuna in the pan and sear all sides for about 20-30 sec each. The inside should still be pink and slightly raw.

Remove from the heat and cut into 1/2 slices.


To assemble the sandwich:

You may toast the bread rolls, if you'd like.

Spit the rolls in half lengthwise. Spread some of the ginger mayo on both sides of the bread. Place some coleslaw or lettuce on the bottom, then finally some of the seared tuna slices. Top with the other half of the bread.


Tuesday, August 25, 2009

Corned Beef and Cabbage


I believe this is a dish familiar to those from Ireland and several parts of Asia as well. Correct me, if i'm wrong. Corned beef. A simple easy dish that can be made in just minutes. I used the canned corned beef, but you can get you hands on the real fresh stuff, go for it. Mine's just a cheat and easy way of making it. Just pop it open and voila. Meat in a can. Even though they say it's ready to eat, I prefer to cook and heat it up in a skillet.

Corned beef, onion, cabbage. That's all there is. During cooking it will tend to look dry. I don't like that. My solution was to add some tomato slices to keep it from drying out rather than oil. Replace the cabbage with potatoes and you've got yourself some good ol' hash. You can even turn the leftovers into an omelette. The one way I always eat this is to mix it into some plain white rice. It may not look pretty, but it sure is appetizing.

Serves 2-4


Corned Beef and Cabbage

1 12oz can corned beef
1/2 medium onion - sliced
1 medium tomato or 12 cherry tomato - sliced
1/2 head medium cabbage - shredded
salt
pepper
olive oil

In a pan, heat about 2-3 tbsp of oil. Saute the onions until limp and translucent. Season with some salt and pepper.

Add in the onions and cook until the juices from them are release, then add in the corned beef.

Break the meat into pieces and stir. The juices from the tomato will help to keep the meat from drying out.

Then add in the shredded cabbage. Stir well and cover for several minutes until the cabbage have slightly wilted, but still green.

Turn off the heat and serve warm.


Monday, August 24, 2009

Pasta Scramble


There's this show that's currently on Food Network called "The Best Thing I Ever Ate" or something along those line. A recent episode dealt with breakfast dishes and one of the Chefs featured was Susan Feniger (Owner of Street, here in LA). The dish she mentions is this pasta dish called "Pasta Mama." I can't remember from what restaurant it's from, but for you LA people, if you know what I'm talking about please let me know what restaurant it's from.

Anyway, it's basically spaghetti mixed with scrambled egg. It's not egg that's been cooked then mixed into the pasta. It's egg that been cooked into the pasta. I found this to be really interesting, so I decided to try and recreate this dish on my own. I haven't tried the original, but I'm sure it's fantastic.

My version consists on penne rigate. I boil the pasta to al dente then cook it in a skillet, similar to pan-frying noodles, but not quite. Then I mix in the raw scrambled egg and stired to cook it as well as coat the pasta. I added some herbs and parmesan to the mix as well. It's so good. I had this for dinner. Who said breakfast as to be in the morning? For this dish, I'd say at least 2 eggs per person.

I served it with a side of fresh cherry tomatoes that I tossed in a tiny bit of olive oil and salt.

Serves 2.


Pasta Scramble

1/2 box penne rigate
4 eggs
3 Tbsp grated parmesan (plus extra)
extra virgin olive oil
salt
1 Tbsp dry or fresh basil
1 Tbsp dry or fresh oregano

Note: 2 eggs per person

Mix the egg with the parmesan and lightly season with salt.

In boiling water, cook the pasta until al dente. Roughly 9-10 min. Drain and lightly coat with some olive oil.

In a skillet, heat a little more olive oil and add in the pasta. Right after add in the egg mixture. Stir occasionally to mix the egg into the pasta and to cook it as well. Once the egg looks cooked, add in the basil and oregano. Toss for another minute.

Serve warm.

Sunday, August 23, 2009

Bday Dinners and some awards

Before we start, after you read today's post, head on over to my other blog The Misadventures of Little J to see a little animation I did a few years back. (here)

Now I rarely do restaurant reviews of any type because well I suck at it. But last weekend, I had a birthday dinner for my cousin at Amici Trattoria at the Americana on Brand in Glendale, Ca. I think it just opened several weeks ago. Every time I pass by, the place is always full of customers. Inside and out. There were 5 of us. My mom, my two cousins, one of which was the birthday celebrant and my cousin's friend. I apologize for the color of some of the pictures as some are a bit blurry. I didn't use a flash. My point and shoot is really a piece of crap at the moment. I've put it through so much. I think it's time for it to retire.

Anyway, the place was pretty packed when we got there, but we were lucky to have been seated right away. The prized spots were in the patio, but a party had reserved it at the time. I was fine with eating inside. It's a decent sized space. The tables were placed a bit close to one another, so there were a lot of "excuse me" going around. Decor looked modern. Lighting was on the slightly dimmed side. Our host and waiter were two burly men with what I think were Italian accents. They may have looked intimidating, but were really friendly.

Someone from the waitstaff brings out the traditional bread basket with some rosemary foccacia and slices of french bread. Accompanied with olive oil and balsamic vinegar. We wanted to order some wine, but the wine menu was several pages long. Literally. It was a book! I didn't want to spend too much looking at it as I was really hungry. It took me forever just to think of what I wanted to eat, let alone choosing a wine was something that would take me another hundred years to decide. I'm not picky, I just can't choose from all the delectable selections. I was saving up my appetite for this meal.

The waiter takes our order without writing down our choices as I request for another round of bread. You know I love bread, right? From the anti pasti selection, we ordered Frittura di Calamari e Zucchini. Calamari and fried zucchini with a side of marinara. Both of which were nice and crispy when brought to our table. That was gone in a few minutes.

We didn't have to wait long for the main course. With the place being so busy, waiting wasn't much of an option. There were a bunch of other people waiting to have a seat. It was really packed. Our entrées arrived nearly one after another as another person from the waitstaff comes around carrying a big bowl, with spoon in hand, of freshly pre-grated parmegiano reggiano. Offering us if we'd like to add extra cheese to our dish. I opted not too. my dish was already packed with cheese. The portions were large, but really good.

My mom had the Linguine Alle Vongole Veraci. Linguine with manila clams in light olive oil and white wine sauce. Here we go with the white wine sauce again. I'm telling you, I got her hooked!


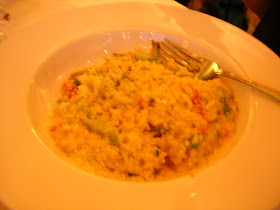
My cousin ordered the Risotto ala Catalana. Italian Arborio rice with shrimp and baby asparagus with saffron. I had a taste of this and the risotto was nice and creamy. It was really good also.

I had the Milanese di Pollo. Or Chicken Parmigiana. It was nearly the size of my head. Yes, it was that big. Made from breaded organic chicken served with sautéed arugula and roasted garlic potatoes. The chicken was nice and tender. Cooked just right. The mozzarella perfectly melted with just the right amount of sauce. I'd pick up a piece and that lovely string of melted cheese would tag along for the ride into my mouth. I finished the whole thing. I was hungry, remember? But I enjoyed it.

I didn't take a picture of the other two dishes, but one was a Capellini Alla Checca, angel hair pasta with a chopped tomato and basil. The other was Penne Arabiat, penne with a spicy marinara sauce. I think there was chicken in there, too. I can't remember.

With our stomachs full, we couldn't end the meal with just our entrées. No, no, no. I say desserts are an essential for occasions such as this. So we ordered a nice slice of tiramisu to close the meal. We all shared and loved it. A lot of Italian places I've been tend to go overboard on the rum and/or espresso and that can get a bit overwhelming sometimes. This tiramisu was just right. There was barely a hint of it. Did you know that tiramisu originally never had alcohol in it? The mascarpone cheese filling was so smooth, it was soothing to the palate. Slight touch of espresso, soaked just enough into the sponge cake. There were a couple fresh raspberries and blueberries on the plate as well and the familiar dusting of cocoa powder. It was so good and I wanted more, but I didn't want to force my stomach. I wonder if you can order a slice to go. I must find out. Tiramisu is one of the desserts I love and will soon make on this blog. Stay tuned.

Overall for 5 people it was a decent price for an upscale like restaurant. I'd definitely try this place again. Maybe next time, I'll try one of their pizza, pasta or seafood dishes

Trattoria Amici at the Americana at Brand (across from Barnes and Noble)
889 Americana Way
Glendale, CA 91210
818.502.1220


Next, a couple weeks ago, I received a few awards. For the first three, I'd like to give a special shoutout to Finsmom from Latest Addiction for passing them along to me.


This last one I'd like to also give a special shoutout to Heather from Girlichef and Kim from The Ungourmet for passing this to me this very brand new award.

Please visit these lovely ladies blogs. They've got some awesome drool worthy recipes, and deserve this tasty award as well as the many food blogs I read everyday. I share this with all of you.

Don't forget to come back tomorrow. The picture below isn't your average pasta dish. A new day, a new recipe. Ciao!!

Saturday, August 22, 2009

Roasted Corn with Basil Oil


Actually, this post it more about the basil oil than the corn itself. I already posted about Oven-Roasted Corn. I had just cut the kernels from the cob to prevent from having to pick them out from my teeth after eating. I was watching Grill it with Bobby Flay and he had made this really simple basil oil. That got me interested as I love basil. A couple weeks ago, Greg from Sippity Sup! had devoted a bunch of posts to the good ol' basil and its variety. So you know how it goes...you get a craving and you need to fulfill that craving.

It only involves 3 ingredients: fresh basil, extra virgin olive oil and a pinch of salt. I blended everything together in the food processor and placed it into a sealed container. I had a good batch of the stuff and let it sit on the fridge for at least 30 minutes to help marinate it together. You can make this in advance or let it sit for 30 minutes. Open up the container and it smells so good. Almost like pesto. It will keep for several days.

I mixed it into the corn kernels. In a way, it was like a corn salad. It was really good with a subtle pesto-ish taste.


Roasted Corn with Basil Oil

Roasted Corn on the Cob recipe

To remove corn kernels from cob carefully stand the cob straight up, holding the tip. Take a knife and cut down removing the kernels. Mix in a couple tablespoons of the basil oil and mix.


Basil Oil:
1/2 c Extra Virgin Olive Oil
1 c fresh basil

In a food processor or blender, combine both ingredients together until the basil is finely chopped.

If you don't have a food processor or blender, simply fine chop the basil and mix it into the oil. Mash it together with a mortar and pestle or press firmly while stirring with a spoon.

Store in a jar or container with a lid. This may be done in advance. Let it sit for at least 1/2-hour to left the flavors marinate together.

Drizzle as little or as much over you favorite dish.

Friday, August 21, 2009

Triple P (Peach Puff Pockets)


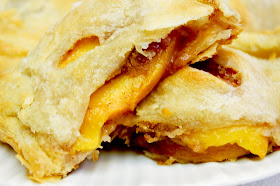
Peachy peach peach peach. I can't get enough of peaches. I already made a peach tart a few weeks back with the peacherry tart. So I decided on making another simple peach concoction. This one is a little more hands on friendly as you can hold it like a danish or something similar.

I poached the peaches for a few seconds in boiling water to remove the skins, then cut them into wedges. I made a little streusel type mix made of crushed graham cracker, cinnamon, sugar and a little butter. I coated the peaches in that before dumping them into the puff pastry. Sealed it like a pouch and baked. When they finished, I coated them with a little bit of honey to give the crust a little sweetness as well as a nice shine.

Look at the little peach playing peek-a-boo.

Serve 3


Triple P (Peach Puff Pockets)

1 sheet puff pastry - divided into three pieces
2 ripe peaches
3 graham cracker square - crushed
1 tsp granulated sugar
1 tsp cinnamon
1 tbsp melted unsalted butter
honey


Preheat you oven to 425˚F

Combine the sugar, cinnamon, graham cracker in a large bowl. Set aside.

Poach the peaches in some boiling water for roughly 45-60 seconds. This will let you remove the skin of the peaches. Once you've removed the skin, cut them into thin wedges and remove the pit.

Add the peach wedges to the cinnamon mixture and toss to combine.

Divide the puff pastry in three rectangular pieces. Divide the peaches among the three puff pastry pieces. Only putting them on one side leavint at leas 1/2-inch to seal the pouch.

When you've divided the peaches, take the other half of the puff pastry and fold over. Crimp and fold the edges to seal. Place them on parchment paper lines baking sheet and baste with the melted butter.

Baked for 15-20 min. Remove from the oven and lightly coat the top with some honey.

Best served warm.


Thursday, August 20, 2009

Broiled Ginger Teriyaki Salmon


There's this one sushi place I love to go to in Pasadena, CA., called Afloat Sushi. It's one of those conveyer belt places. They have theirs in little boats floating on water. Once of the items I always have to get is the flame broiled salmon teriyaki. It's chunk of salmon flame broiled and basted with a teriyaki sauce. I always end up eat two of those. Along with a salmon skin roll.

I bought a nice long fillet of sockeye salmon from the farmer's market. Divided it for two. I simple seasoned it with salt, pepper and minced garlic. Placed it in the broiler for a couple of minutes giving it an initial cooking. At that time I made a ginger teriyaki sauce. It includes fresh ginger, soy sauce, brown sugar, garlic, rice wine vinegar, some ground pepper and tomato ketchup. After the first few minutes, I basted the salmon with a thick layer teriyaki sauce and broiled it for another couple of minutes letting the sauce coat the fish. I basted it one last time right before serving. The final result was a tender flaky fish with a slight firm crust. So good.

At the request of my lovely mom, I served this over some sauteed asparagus with white wine sauce. I think I got her hooked on that sauce!!!!

Serves 2.


Broiled Ginger Teriyaki Salmon
2 salmon fillet
salt
pepper
1 garlic cloves - minced

Teriyaki Sauce:
3 Tbsp soy sauce
1 Tbsp brown sugar
1 tsp grated or minced fresh ginger
1 garlic clove - minced
1 tbsp tomato ketchup

(To view the white wince sauce click here)

Preheat your broiler.

Combine all the ingredients for the teriyaki sauce until sugar dissolves and slightly thickened.

Season the salmon fillets with salt, pepper and the minced garlic. Place the salmon on a lightly geased baking sheet and set into the broiler for 2-3 min.

The baste well with the teriyaki sauce. Broil for another 2-3 min.

Remove from broiler and serve.