Search Bread + Butter

Showing posts with label dessert. Show all posts

Tuesday, December 7, 2010

Eat My Blog: White Chocolate Brownies with Peanut Butter chips


I once again participated in the Eat My Blog bake sale that took place this past Saturday at Tender Greens in West Hollywood. I had made these tasty guys last year and I felt it was right to bake them up once again for others to taste the deliciousness of chocolate. :) I whipped up some white chocolate brownies with peanut butter chips.


I ate up the side scraps and bits and pieces that fell off. Call it a rewarding midnight snack. :)  The texture is a mix between a cake and a brownie with the peanut butter chips half way melted int he nooks and crannies.  Hope that's a good enough description to whet your appetite.


Wrapped each square in a treat bag with a little B + B card attached to the back, then made my delivery. I did make a small little batch for myself the next day. Those scraps weren't enough to fill  me up with white chocolate goodness.  I'm happy to report that the Eat My Blog bake sale went great. Raising over $3700 for the LA Food Bank. Woohoo... I'm sure you can find recaps on the event from many LA bloggers. (Here's one from Cathy at Gastronomy Blog.) I'm glad to have been able to participate in some capacity. Can't wait for the next one.


White Chocolate Brownies with Peanut Butter chips

1 c white chocolate chips (plus extra)
1 c granulated sugar
1/2 c unsalted butter or margarine (softened)
2 eggs
1/2 Tbsp vanilla extract
2 c cake flour or all-purpose flour
1/2 tsp baking powder
1 c peanut butter chips
1/4 tsp salt
1/4 c water

Preheat oven to 350˚F

Sift together flour, baking powder, salt. Set aside.

Melt the white chocolate white chocolate chips in a bowl with the water. Heat in the mircowave for 1 1/2 - 2 min or until melted. Stir the mixture after the first minute to combine. Or use the double boiler method. Bring some water to a boil in a small pot. Once the water is boiling bring it down to a simmer. Place the chocolate and water in a metal bowl and place on top of the pot. Stir chocolate ocassionally to combine until melted.

In another bowl, cream together butter and sugar. Then add in the eggs, mixing after each one. Add in vanilla, then the melted white chocolate. Combine well then slowly add the flour mixture. Mix well until there are no lumps.

Add in the peanuts butter chips.

Lightly grease preferred baking pan and pour in the batter. Sprinkle a little more white chocolate chips on top.

Baked for 25 min. Let it cool for at least 5-10min then cut into squares.


Friday, December 3, 2010

Thanksgiving Dish #5 - Strudel with Phyllo dough


Finally. Last, but not least. No meal would be complete without dessert. As much as I wanted to make pie, I wasn't going to make pie this year. I already had a full menu and I wanted to try and spend a little time in the kitchen and still enjoy the cooking. I had seen something similar to this on one of those Food Network Challenge show. It was the Thanksgiving episode. One of the contestants made a strudel using phyllo dough that she had made herself. It was a cool process to see homemade phyllo dough. Though I wouldn't really attempt to make my own. I wasn't quite clearly paying attention to what ingredients she made the filling with , but I remember vaguely bits and pieces of it.

For mine, I used a combination of chopped walnut, crushed pistachios and cranberry sauce. With a nice little mix of cinnamon-sugar. Tangy and sweet would be the two words that come to mind with this dessert. THe nice crisp crunch of the phyllo dough when you bite into it. Be sure to let it off off a bit before taking a bite or you'll burn your tongue like I did. I was hungry and eager by that point. It's a nice way to end a meal, too. Kind of gets rid of that meaty herby taste of the chicken. Deliciousness.


Strudel with Phyllo dough

4 12-inch sheets of phyllo dough
2 Tbsp cinnamon
2 Tbsp granulated sugar
2 Tbsp brown sugar
1 c chopped pistachios
1 c chopped walnuts
1 c cranberry jam or sauce
egg wash (1 egg beaten with 1 Tbsp water)

Preheat your oven to 350˚F. Combine the cinnamon, granulated sugar and brown sugar. Mix well and set aside.

Lay out two phyllo dough on a flat surface. Cover the rest with a damp paper towel to keep it from drying out. Layout two sheets of the phyllo dough, one on top of the other. Sprinkle half of the cinnamon mixture over and spread it evenly all over. Sprinkle half the walnuts and half the pistachios. evenly distribute the cranberry sauce over various areas.

Then, carefully roll the phyllo dough from one end to the other. Gently lifting one end as to not tear the sheets. Try to roll them as tight as possible to prevent from spilling the filling.  Cut into even smaller pieces and place onto a baking sheet. Baste with the egg wash and place on a baking sheet.

Repeat the process with the other two sheets of phyllo dough. Bake for 10-15 minutes until the phyllo dough has lightly browned. Serve warm.


Monday, May 10, 2010

Frozziyo


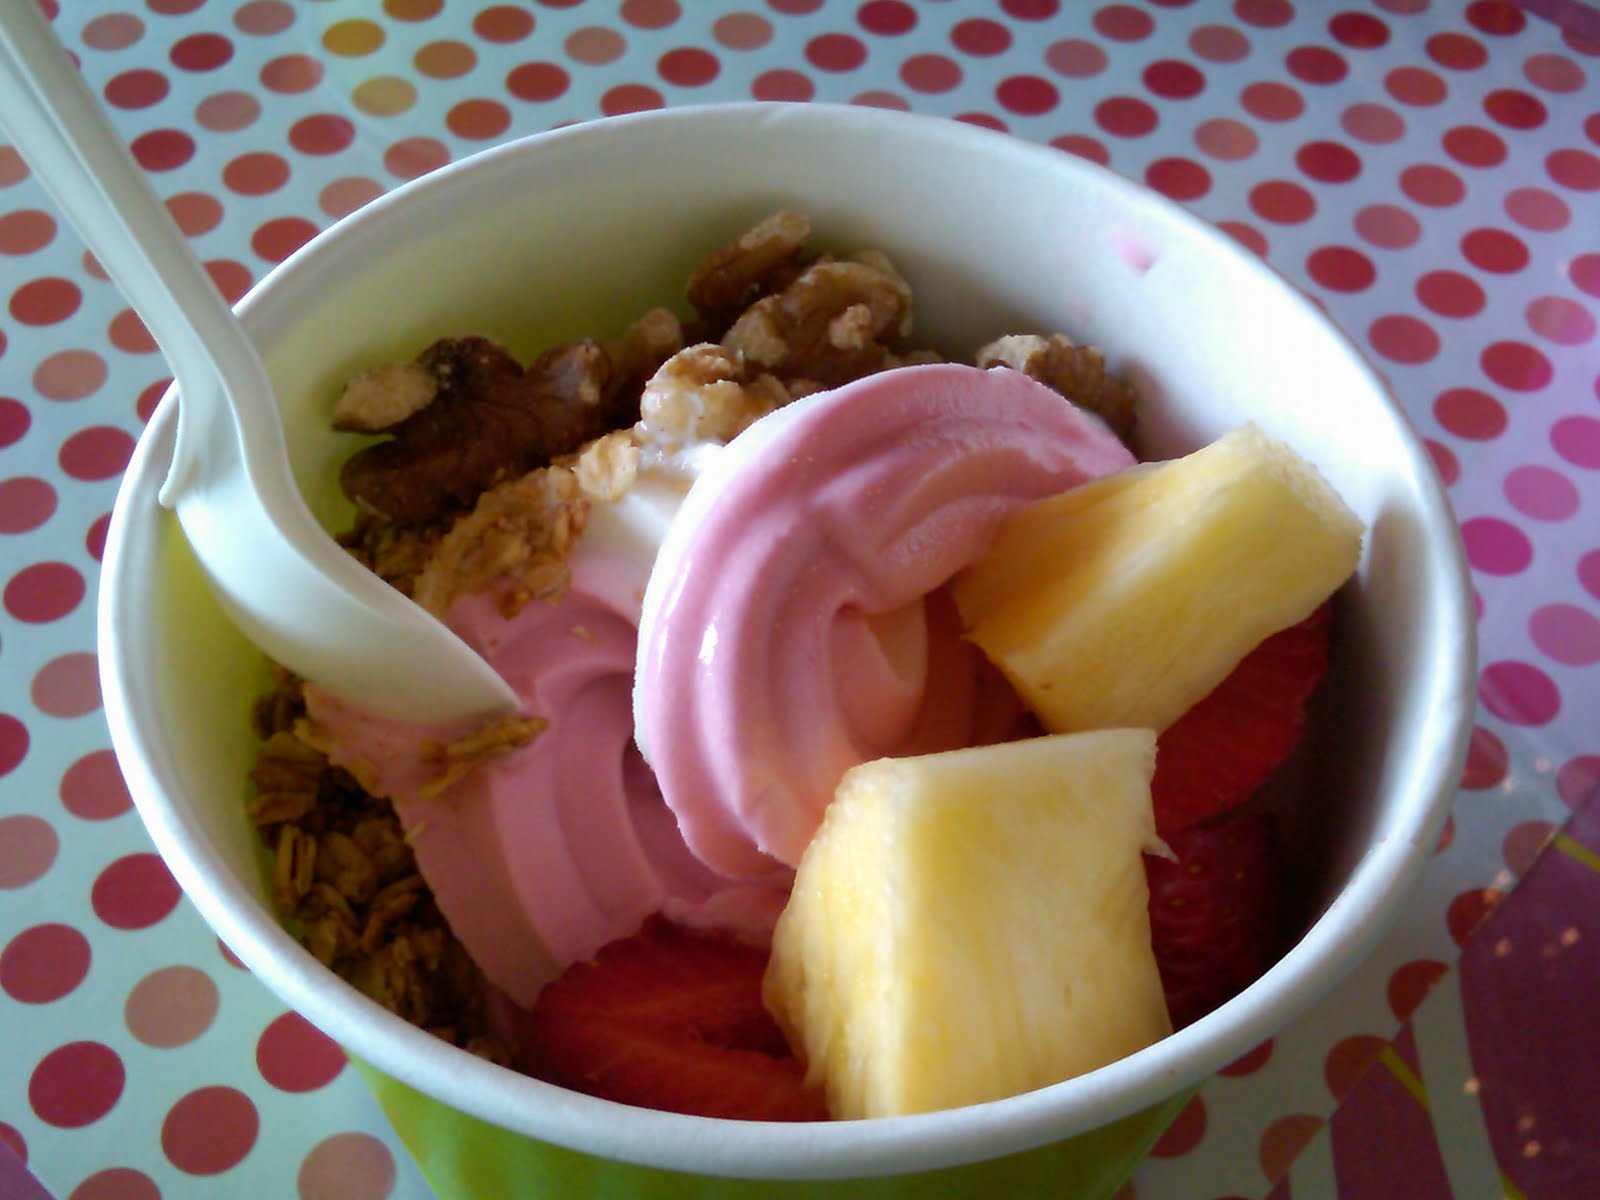
With the frozen yogurt crave, there's been a myriad or little shops popping up around difference cities. I was invited by a couple friend of mine for a little catch up time over some froyo. Frozziyo located in Pasadena near PCC (Pasadena City College). The location of the place is sandwiched between two other large stores on Colorado Blvd in Pasadena, CA. They've only been around for a year, but from the couple hours I spent chatting up with my friends a good amount of patrons walked in and out with their yogurt.


They got a nice selection of flavors. Vanilla, chocolate, plain tart, pomegranate, rev velvet, green apple...I think there's a couple other flavors there, too.


I get myself half plain and half pomegranate, which was a nice choice. I enjoyed quite a lot. Then again. I love me some froyo every now and then. My topping of choice is usually some fresh fruit like strawberries and pineapple with some granola and nuts. Today it was walnuts. A good afternoon well spent with friends and a frozen dessert.


Frozziyo
1771 East Colorado Boulevard,
Pasadena, CA 91106

Monday, December 28, 2009

Red Velvet Cake Truffles


Alrighty, these next few days I'll be showing you the Noche Buena/Christmas feast. I usually end the meal with dessert, but I couldn't resist by posting these babies first. This has now become a tradition with me which I started last year. Rather than going out and spending a load of money on things people may not like, I decide to make some delicious holiday goodies. Red velvet cake truffles were my choice this year. Well they're really cake balls, but truffles sounds a bit fancier. It has a coating of white chocolate and some red sugar sprinkles.

You make the cake like you would with any other cake and frosting. Just add a few steps into turning them into balls. You'd want them generally no larger than a golf ball. I added some photos as to how I coat the cake balls with the chocolate. It's the technique I use, but you don't have to follow it. What ever you're comfortable with. No fancy equipment needed. I used a fork and spatula.

To package them, I neatly placed then in mini cupcake liners and placed them in a treat box. Nine per box. Sealed it with a "Home Made" sticker with a little holiday greeting and off it went to the recipient. The recipe below was adapted from a red velvet cupcake recipe from Simply Recipes. I ended up making 240+ balls from two large batches. Oh yeah. Many happy people were pleased. The recipe below will make 1 batch. Oh, if you you're a little short on time you can aksp use those ready mix cakes from the market. 

They were a hit!

Makes roughly 50 to 75 depending on size.


Red Velvet Cake Balls
adapted from Simply Recipes

2 c cake flour
2 eggs - room temp
2 Tbsp cocoa powder
1 tsp baking powder
1 tsp baking soda
1/2 tsp salt
1 c buttermilk
1/2 c (1 stick) unsalted butter
1 c sugar
1 tsp vanilla extract
1 tsp apple cider vinegar
1 Tbsp red food coloring
18 oz of white chocolate chips - 1 1/2 12oz bags
red sugar sprinkles

Frosting
8oz cream cheese
1/2 c butter - 1 stick
2 1/2 c powdered sugar
1 tsp vanilla extract

--
Note: if you're short on time you can also use the boxed cake mixes. All you will need is the white chocolate, sprinkles and the frosting ingredients.
--

Preheat your oven to 375˚F
Sift together the flour, cocoa powder, baking powder, baking soda, salt.

In a large bowl, cream together the butter and sugar. Add the eggs one at a time, mixing after each. Then add the buttermilk, vinegar, vanilla and red food coloring.

Once those are mixed together, add the dry ingredients. Mix thoroughly.

Pour the batter into two 9-inch cake pans that are lightly greased and lined with wax or parchment paper.

Bake for 25-30 minutes or until a tooth pick or skewer comes out clean.

Let the cakes cool before handling them.

While the cake bakes combine together the ingredients of the frosting and set aside.

Once the cakes are cool enough to handle with your hands, crumble the cake into tiny pieces into the frosting. Mix the whole thing together into a dough consistency.

Take 1 tablespoon of the cake mixture and form them into balls with your hands. Or use a small mini ice cream scoop for even balls.

Place them on wax paper lines rack or baking sheet. Then place them in the fridge for at least an hour to get them hard.


Coating the balls

Double Boiler:
Bring a pot of water to a simmer (never boiling!!). Place the chips in a heat safe bowl and place it over the pot of water. Wait 5-8 minutes and occasionally stir the chocolate until they are melted and smooth.

When they are fully melted stir vigorously for roughly 2 minutes to fully get it smooth and falls from the spoon smoothly. Turn the heat off. If the chocolate looks to get stiff. repeat this step again.


--
To micowave the chocolate
Place the chocolate chips in a microwave safe bowl and heat for 3 minutes. Five the chocolates a stir and heat for 2 minutes. Stir again and reheat again if needed. 
--

Remove the cake balls from the fridge. Scoop a fork into the chocolate and place a cake ball on the fork.


Drizzle over the chocolate and tap off any excess until it looks to have a thin coat.


Carefully place the coated cake ball on the baking sheet and sprinkle some the sugar on top.


Once you have finished with a batch place them again in the fridge to harden.


Note: If you see and/or feel the cake balls becoming soft and crumbly place them in the fridge again for 15-30 minutes.


Saturday, October 10, 2009

Mini Apple Oat Crisp


Here I go again with my mini version. What can I say, I'm a sucker for small. I saw this recipe from about.com for an apple crisp. I had a couple baby fuji apples left. I figured rather than eating them straight up, I'll make something with them.

I adapted the recipe to make two small tart sized crisps. I also added cinnamon to the mixture. Apple and cinnamon really do go well together, right?

I chopped my apples into itt-bitty bits. Almost like a puree or apple sauce, but slices would suffice, and placed them into mini tart pans.  Made the crisp topping and added some oats then baked it for 15-20 in a 375˚F oven and I had my dessert for the night.  A good crunch texture with the softness of the apples. Yum!!

Makes 2 mini crisps.


Mini Apple Oat Crisps
adapted from about.com

1 large apple or 2 baby apples - peeled chopped
1 tsp cinnamon
1 Tbsp butter - melted
1 Tbsp brown sugar
1 Tbsp granulated sugar
1 Tbsp flour
1 Tbsp oats
2 Tbsp water
2 small ramekins

Preheat your oven to 350˚F

In a small bowl, toss the apples and cinnamon together and pour into small ramekins.

In another small bowl, combine the both sugars, flour and oats. Pour in the butter and mix well until it's like a crumbly consistency.

Pour the mixture over the apples, then pour the 1 tablespoon of water over each ramekin.

Bake for 15-20 min until top is browned. Let it cool slightly before serving.


Saturday, September 26, 2009

Mini Peach Cobbler


Don't you just hate it when you have to share? Though, I do love sharing. Sometimes there are moments when you want to keep something to yourself. This was one of them. A nice little personal peach cobbler. One I can have all to myself.

I had some peaches that I wanted to baked something with. But it wasn't enough to make a full pie or a tart of some kind. I didn't feel like taking a lot of effort into making some kind of dough. I decided on make then into mini sized desserts. I remembered I had saved the small tart foil cups from some fruit tarts I made a while back. I knew I'd find another use for them. Woohoo...

I also used two  graham cracker mini tart rounds I had in the pantry. Those are optional This one is easy to make. Peeled the kinds from peaches and sliced them up. Tossed a bit of cinnamon in them to bump up the flavor level. Then placed them in mini tart cups and baked until the cobbler topping was nice and browned. 

Look at that peachy goodness wanting to pop out from under the cobbler topping. It's saying: "eat me."

Makes 4 mini cobblers


Mini Peach Cobbler


2 Ripe peaches
1 Tbsp ground cinnamon (plus extra)
3 Tbsp butter
2 c flour
1 egg
1/4 tsp salt
 4 small ramekins or foil bowls.

Preheat oven to 350˚F

Poach the peaches in some boiling water for 60 seconds. Let the peaches cool, then carefully peel off the skins and cut into slices.

While the peaches cool, mix together the butter, flour, egg, and salt until a doughy crumb consistency. Set aside.

Add the cinnamon to the peaches and toss together. Divide the peach slices among the 4 ramekins. Then top with the flour mixture. Sprinkle with some extra cinnamon on top.

Place the ramekins on a baking sheet and bake for 20-25 minutes or until the cobbler topping is golden brown.


Saturday, September 19, 2009

Nutella Rolls


I remember seeing these Pain au Chocolate from La Fuji Mama a couple months back. I love croissants and, of course, you know my love for chocolate. I had a can of Pillsbury crescent rolls in the fridge eagerly waiting for me to use them. I had used another can for those delicious Cheese Rolls. This time around I decided to fill them with some nutella. Warm croissant filled with choco-hazelnut goodness. I'm drooling right now at the thought of it.

This is really easy to make. Cut the crescent dough into 4 or 8 pieces, place a nice dollop of nutella on edge and roll it up. Bake it as directed in the can. Roughly 13-15 minutes.

Just looks at that nutella wanting to burst out of the side there. 

Makes 4 large or 8 thin rolls


Nutella Rolls

Nutella
i can Pillsbury crescent rolls

Preheat your oven to 375˚F

Lay the crescent dough out on a baking and cut them into 4 or 8 rectangles.

Place a nice dollop of nutella at one end and lightly roll them up. Place them seam-side down on an ungreased baking sheet.

Bake for 13-15. Serve warm.


Monday, August 31, 2009

Lime Pudding Tarts


This was supposed to be my entry for the Lime BSI a few weeks back that was hosted by Jen at My Kitchen Addiction. The first time I made it I made the mistake of leaving out any support for the graham cracker base.  When I tried to take them out of my mini-muffin pan, it all fell apart. Sure I was a wee bit disappoint that it failed, but the great thing about food is that you can keep trying until you get it right. The mistake I made the first time was not using some sort of paper lining to help ease in removal. Imagine the me trying to pry them out with a fork from my mini muffin pan. It was a nightmare. But I was determined to make them again. And make them again I did!

These tarts are relatively easy to make. Perfect for parties or as a simple dessert after a meal. It uses a graham cracker base. I cheated a little on the graham cracker tart crusts for this go around. I saw these individual mini crusts at the grocery from Keebler and I figured that I'd give them a go. Save me some time. You can use your own or use the premade stuff. I included my recipe for making the graham cracker base from scratch in the recipe below.  The pudding is just regular store bought vanilla pudding spiked with lime zest and 1/2 lime juice. A nice subtle tart taste. Then chill for a bit and enjoy. Add fruit to the top and make it into a fruit tart. It reminded me a bit of key lime pie. Yum!


Makes 4-6 tarts. Adjust accordingly.


Lime Pudding Tart

1 box vanilla pudding mix
2 c milk
zest of 1 lime
Juice of 1/2 lime
fruit (optional)

base:
3 c crushed graham crackers
1/4 c unsalted butter
1 Tbsp Cinnamon
2 Tbsp granulated sugar

4-6 4-inch tart cups or cupcake cups.

Note: you can use the premade mini graham cracker tart crusts if you're short on time.

Preheat your oven to 375˚F

For the graham cracker base, combine the ingredients in a bowl and mix until blended and resembles a crumb consistency. You can also do this in a food processor.

Divide the graham cracker mix evenly among the tart cups and mold up to the sides until it resembles almost a small bowl.

Bake in the oven for 5-10 min. Let is cool completely after.

While the crust bakes, make the pudding according to the directions on the box. Mix in a large enough bowl and add in the lime zest and juice. Stir well to combine.

Then take the pudding mixture and dollop at least 2 big spoonfuls into the tart cups. Top with a slice of lime and/or some berries and place in the fridge to keep cool.


Friday, August 21, 2009

Triple P (Peach Puff Pockets)


Peachy peach peach peach. I can't get enough of peaches. I already made a peach tart a few weeks back with the peacherry tart. So I decided on making another simple peach concoction. This one is a little more hands on friendly as you can hold it like a danish or something similar.

I poached the peaches for a few seconds in boiling water to remove the skins, then cut them into wedges. I made a little streusel type mix made of crushed graham cracker, cinnamon, sugar and a little butter. I coated the peaches in that before dumping them into the puff pastry. Sealed it like a pouch and baked. When they finished, I coated them with a little bit of honey to give the crust a little sweetness as well as a nice shine.

Look at the little peach playing peek-a-boo.

Serve 3


Triple P (Peach Puff Pockets)

1 sheet puff pastry - divided into three pieces
2 ripe peaches
3 graham cracker square - crushed
1 tsp granulated sugar
1 tsp cinnamon
1 tbsp melted unsalted butter
honey


Preheat you oven to 425˚F

Combine the sugar, cinnamon, graham cracker in a large bowl. Set aside.

Poach the peaches in some boiling water for roughly 45-60 seconds. This will let you remove the skin of the peaches. Once you've removed the skin, cut them into thin wedges and remove the pit.

Add the peach wedges to the cinnamon mixture and toss to combine.

Divide the puff pastry in three rectangular pieces. Divide the peaches among the three puff pastry pieces. Only putting them on one side leavint at leas 1/2-inch to seal the pouch.

When you've divided the peaches, take the other half of the puff pastry and fold over. Crimp and fold the edges to seal. Place them on parchment paper lines baking sheet and baste with the melted butter.

Baked for 15-20 min. Remove from the oven and lightly coat the top with some honey.

Best served warm.


Friday, August 14, 2009

Nutella Potstickers


Alrighty, you chocoholics! Today's ingredient is...Nutella. Cue the chorus of Oo's and Ah's. If you haven't tried this stuff, you're really missing out on some really addicting chocolate and hazelnut flavor. It's notable known for being a sandwich spread.

My daily ritual consists of reading an endless amount of blogs everyday. Day and night. Night and day. A couple weeks ago, I was browsing over at La Fuji Mama and she had this recipe for Nutella Banana Gyoza. I thought it was a brilliant idea. Perfect dessert for parties, potluck or whatever. It was just awesome. Have I mentioned yet how awesome Nutella is? I remember having it in sandwiches as a kid. I remember in elementary school begging for a trade with a classmate for her nutella sandwich with my plain ham sammie. Ah, those were the days.

As it just so happens, I had recently bought a jar of nutella few days before. I've been nibbling away at it for breakfast with my morning pan de sal. When I saw the recipe for the gyoza, I knew I had to make it. Last time, I had nutella on a dessert was on a crepe at the mall. The original recipe calls for gyoza wrapper, but the only thing I could find at the store was regular wonton/potsticker wrappers. They'll do. So I made about a couple dozen. One of my bestest and closest friends came by, so she helped make a few them. The ingredients were simple. Nutella, banana, and wonton wrapper.

I did a quick pan-fry of them. The key it make sure the oil is really hot. That way when you set them into the oil, they'll cook up within seconds preventing the oil from soaking too much into the wrappers. Drained them on a paper towel and then sprinkled them with a cinnamon sugar mix. You bite into them. The soft banana with the chocolate hazelnut flavor. So good. These are perfect for parties. Or if you're like me. just eat them for yourself. I did share a few. I ain't greedy.

If you don't like bananas, you can totally omit it and replace it with another fruit or just put a large dollop of nutella instead. Whichever is your choice. This dessert should be put in the "Will cause you to drool" category

Makes roughly 2 dozen or more. Adjust recipe to however many you want to make.


Nutella Potstickers
adapted from original recipe at La Fuji Mama

2 ripe bananas (sliced in 1/4-inch slice) - optional or your choice of fruit
24-30 wonton wrappers
1 jar nutella
egg wash (1 egg + 1 Tbsp water beaten)
canola or peanut oil

Topping:
1 Tbsp granulated sugar
1 tsp cinnamon

Combine the cinnamon and sugar in a small bowl and set aside.

Take a a wonton wrapper, lay it on a flat surface. Take 1/2 tsp of nutella and place a dollop on one side of the wrapper. Leave some room on the edge.

Then take a slice of banana, place it on top of the nutella.

Use the egg wash to wet one side of the wonton edge and fold over into a rectangle.

Do this same process for the rest of the potstickers.

In a large pan, Coat the pan with at least 1/4 to 1/2-inch of canola or peanut oil. Heat it on medium to high heat. You want it to be really hot.

Cook the potstickers for roughly 10-20 secs each side until lightly browned.

Place on some paper towel to drain off any excess oil, then sprinkle some of the cinnamon-sugar on top. Serve hot/warm.


Gooey Deliciousness!!!!!

The cross-section

Friday, July 24, 2009

Peacherry Tarts


Another tart in one week!!!! I know, but it's Friday. That's my only excuse. Besides, who could resist a fruit tart, eh? A peach and cherry tart. Doesn't that make you drool? Yum yum!!!!! I think I'm getting the hang of this whole tart making business.

I poached the peaches for several seconds in boiling water to help in removing the skins. You can used the canned stuff, too. But since they're in season right now, why not go for the fresh stuff, right? As I mentioned when I made the Banana Cherry Smoothie, I don't have a cherry pitter. I did mine the old fashioned way. Sliced and split by hand. Took a a good maybe 10 min to do 3 dozen cherries. It didn't feel that long. When get a rhythm going, it goes by fast.

I turned the cherries into a simple compote and poured it half way through the baking process as to avoid spillage from the edges. No base on this as the juices and syrup of the cherries will soak up into the puff pastry. Sprinkle a little bit of powdered sugar on top and serve chilled or warm. It's so delicious either way.

This will make 6 small tarts or 3 long rectangular tarts.


Peacherry Tarts

1 puff pastry
2 ripe peaches
3 dozen cherries
1/4 c granulated sugar
powdered sugar
1 Tbsp melted butter


To remove the skins from the peaches, soak them in boiling water for 45-60 sec. Then soak into into into cold water to let them cool. Once cool peel back the skins and discard. Slice the peaches into thin wedges and set aside.

Preheat your oven to 375˚F

Cut the puff pastry into 6 small rectangles or 3 large rectangles. 1/2-inch from the edges score 4 lines creating an inner square. This will the crust.

Place peach wedges within the pastries. Basted the edges with the melted butter and bake them for 15 min.

While the pastries are baking, in a sauce pan, combine together the cherries and sugar. Heat them until the juices from the cherries are released.

Pour the compote over the baked puff pastries and bake the tarts for another 10 min.


Wednesday, July 15, 2009

Sago at Gulaman


I'm in a Filipino mood. Been somewhat craving summer treats from the motherland. Summer days equals air conditioning and ice cold refreshing drinks. I'm digging deep down into my roots and sharing with you a classic treat. This is a common drink served by street vendors with their homemade foods. Sold for less than P5 per cup. Pesos. That's like a few US cents. I'm horrible with exchange rates, but I know it's considerably really cheap. You'd also find this at any, if not most, Filipino gatherings.

Every time I visit The Peach Kitchen, a fantastic blog that is run by Peachkins, I'm always reminded of the foods I grew up on. I did grow up in Los Angeles, I'm fortunate that there's so many stores and restaurants and parties that serve and make foods from the Philippines. On one of her recent posts (here) I saw a picture of a large container of this delicious drink and took it upon myself to make some. Actually, it's been on my agenda of things to make, but I've just finally had to push myself to make it. Besides, this is a "hot weather" drink.

Sago at Gulaman, which in English is translated to tapioca pearls and agar jelly, is served in a simple syrup as a shaved ice dessert or as a refreshing drink.


Sago (sa-go) are practically the same stuff you'd find in boba. Cooking tapioca pearls is a bit of a process. Not hard. It just takes a bit of time. There are three ways you can to do them:

1. Boiling the pearls the day before waiting 12 hours, boiling them again and wait another three hours or more before serving.
2. Boiling the pearls for 2 hours straight (constantly stirring)
3. Buy the "ready made in syrup" kind.

Option 2 and 3 are for those who can't wait that long and don't have much time. But you can still do the first one even if you have a time limit. Knowing me, I'll take option 1 and 2. For some reason, I feel like I'm cheating if I use option #3. Not that there's anything wrong with that. It's just how I roll. I've got some time anyway. Besides, this drink isn't hard to make. You just want the tapioca pearls for be really soft ad slightly firm and tender at the center.

Gulaman (gu-la-man) is a type of firm jelly made from agar-agar, which is process seaweed. Many Asian countries use them as well. You can use jello, but the consistency won't be the same. Or you can omit it all together. It's up to you. You can find them in three varieties:

1. The canned version, which is the jelly already made and preserved in syrup. The other side had an the English name of it. It didn't occur to me to picture the other side until I threw the can away. I think it had "ai jar jelly" written on it. I spiked it with a couple drops of banana extract.


2. A dry seaweed block. Similar to the consistency of nori sheets, but in different colors.

3. The boxed version like jello.

I took option 1. It's what I'm used to using. It's also has to be unflavored. You can these two items in many Asian markets.

There's really no special way to serve this. Put the tapioca pearls and agar jelly in a cup. Mix it with some simple syrup (brown sugar and water) and have it as a shaved ice dessert or as a iced drink. Eat it the tapioca pearls with a spoon or if you can get your hands on one of those jumbo straws.

I have one of those manual hand crank ice shavers. That thing it probably close to 20-years-old and still works like a charm. *knock on wood* It's like a workout just getting a cup-worth of ice shavings, but I'm happy to put the effort into it. Burn a calorie or two and add it back on with a sweet drink. The ice melts when I drizzle the syrup over creating instant liquid.

You can make a large batch for a party, too. I guess you can call it the Filipino version of the punch bowl because it's usually served in large containers. I've put the instruction for those who are adventurous to try the making the tapioca pearls the old fashioned way.

Easy-peasy and minutes to make that will satisfy the sweet tooth. It's a refreshing drink that beats the heat any day.


Sago at Gulaman

Sago (Tapioca Pearls):
8oz tapioca pearls
2 1/2 liters water

Gulaman (Agar Jelly):
12 oz agar jelly or jello (unflavored)
a couple drops of Banana extract

Simple Syrup:
1 c Brown sugar
1 1/2 water


(Note: you can also speed up the process by boiling the tapioca balls for 2 hours straight or until all or most of the white starch has disappeared. Be sure to stir occasionally to keep them from sticking. Make sure to replenish the water to prevent them from burning. Put into a container filled with water to cool them before serving.)


Bring the 2 1/2 liters of water to a boil. Add in the tapioca pearls and let them cook for 15 min. Stir constantly to keep them from sticking.

It will look like this after the first cooking. Still small, but a bit plump.

Drain and remove from pot. Rinse them in cold water to cool them down, then put them in a container full of water and let it rest for at least 12 hours or over night.

Slightly plumper.

Then boil them again with another 2 1/2 liters of water for 10 min. Rinse them in cold water to cool and then put them in a container full of water and let it rest for 3 hours in the fridge or until all the white parts have disappeared.

Fully grown. Doubled in size.


Putting it all together:
Cut the jelly into square chunks. Size is your choice. Add a couple drops of banana extract and gently mix. Set aside.

Make the simple syrup by bringing the 1 1/2 c water to a boil. Add the brown sugar and stir occasionally. You want all the granules to dissolve. Let it cool completely before using.

Take a large cup or drinking glass and place some of the tapioca pearls and agar jelly. Top with some shaved ice or or regular ice and drizzle in some of the simple syrup. Add water, if needed

Note: If not using all the cooked tapioca pearls, keep them soaked in water in the fridge or they will harden and stick to each other.

Blog Widget by LinkWithin
Powered By Blogger